Unglazed bisque ornaments: a happy accident
I was really excited about the results I got lasering on porcelain ornaments, so I tried to order a bunch on Amazon Prime. But I didn’t pay close attention to the description and accidentally bought these unfinished bisque ornaments instead. I had been planning to send them back, but I couldn’t stop thinking about what it might look like to try to do a 3d engrave on one. So I picked a test ornament to sacrifice, and tried out a simple gradient with increasing power settings. The gradient showed up pretty well!
A test 3d engrave of basic gradients on ceramic bisque using my glowforge. I used lower power on the left and higher power on the right; you can see higher power is darker.
I searched Google Images for bump maps, and tried engraving one of those with the best gradient settings I found (full power, 500 speed). It looked kind of carved, just like I wanted!

A test 3d engrave of a bump map found online. It shows depth well.
So I decided to try a real photo. I started out like I usually do, cutting the subject of the photo out of the background.

One of my favorite pics of my son and his grandma, with the background cut out in photoshop.
Then I played around with the Silver Efex Pro filter to convert to black and white with lots of structure and contrast. I cut the photo into an ornament-friendly circle with the ellipse tool, and added an outer glow to the layer.

The same image above cropped to a circle and run through the Silver Efex Pro filter.
Finally I used the ToonIt! filter to make the artwork look more like a line drawing. I chose the “anacleto” style because it left a lot of white even in the dark areas of the photo.

The same image above run through the ToonIt! filter to make clearer lines to engrave.
Then I sent it to the Glowforge, and it came out great! Now off to make more!
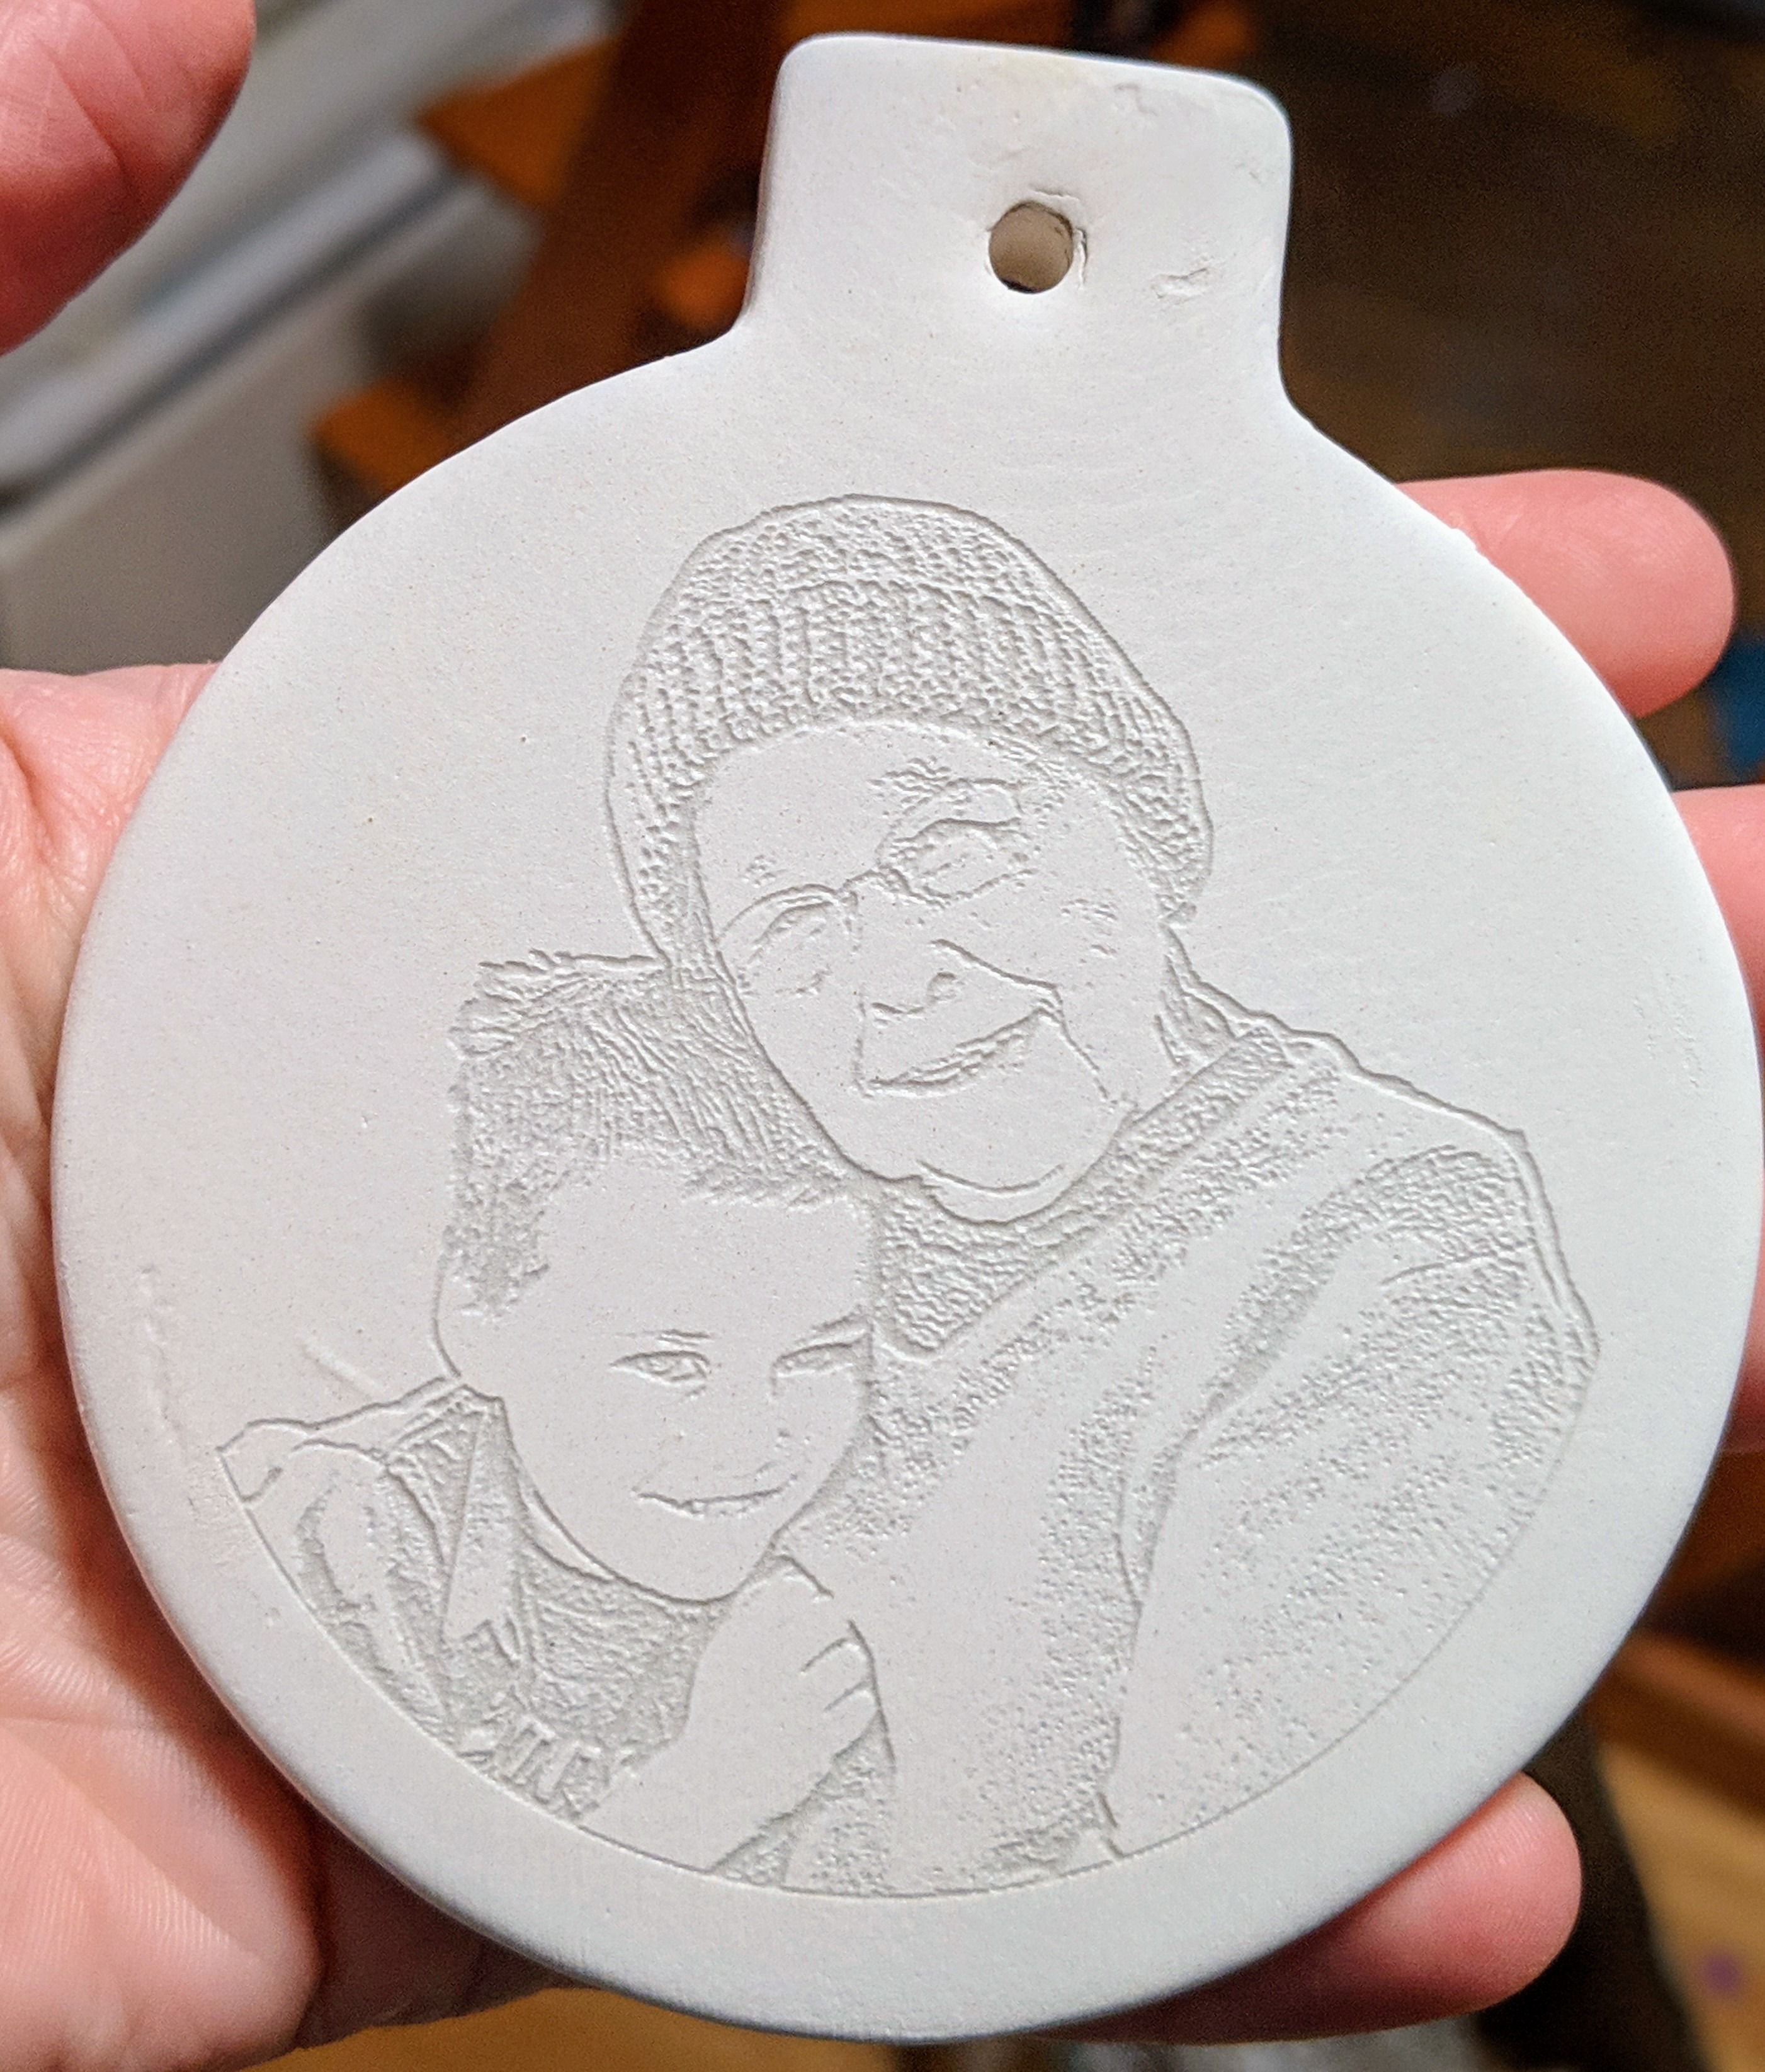
The finished product.