Halloween 2016: Ninjago!
My dad passed away this week. It’s an especially sad time of year because he always made such amazing Halloween costumes for us as kids. He and my mom would work as a team–she did a lot of research, finding sewing patterns and techniques in magazines, and he did a ton of awesome engineering work bringing chicken wire and masking tape and foam and spray paint together into these amazing works of art. I always loved to see the awesome costumes they would make out of these disparate parts, and it was one of the things that influenced my decision to go to engineering school; that basic joy in building something new has always been a big driver for me. I’ll miss my dad a lot, but at least Doug and I can carry on the Halloween tradition. Every year we work together on costumes for the kids; this year they are really excited about Ninjago.
We started out by doing a lot of research on how people make minifig costumes. One thing that’s really great about Lego is there’s such a huge community out there! An image search for “minifig dimensions” yields tons of results like this:
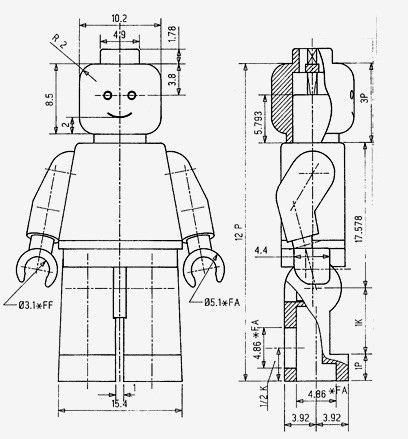
An example of minifig dimensions found online. An image search pulls up tons of information.
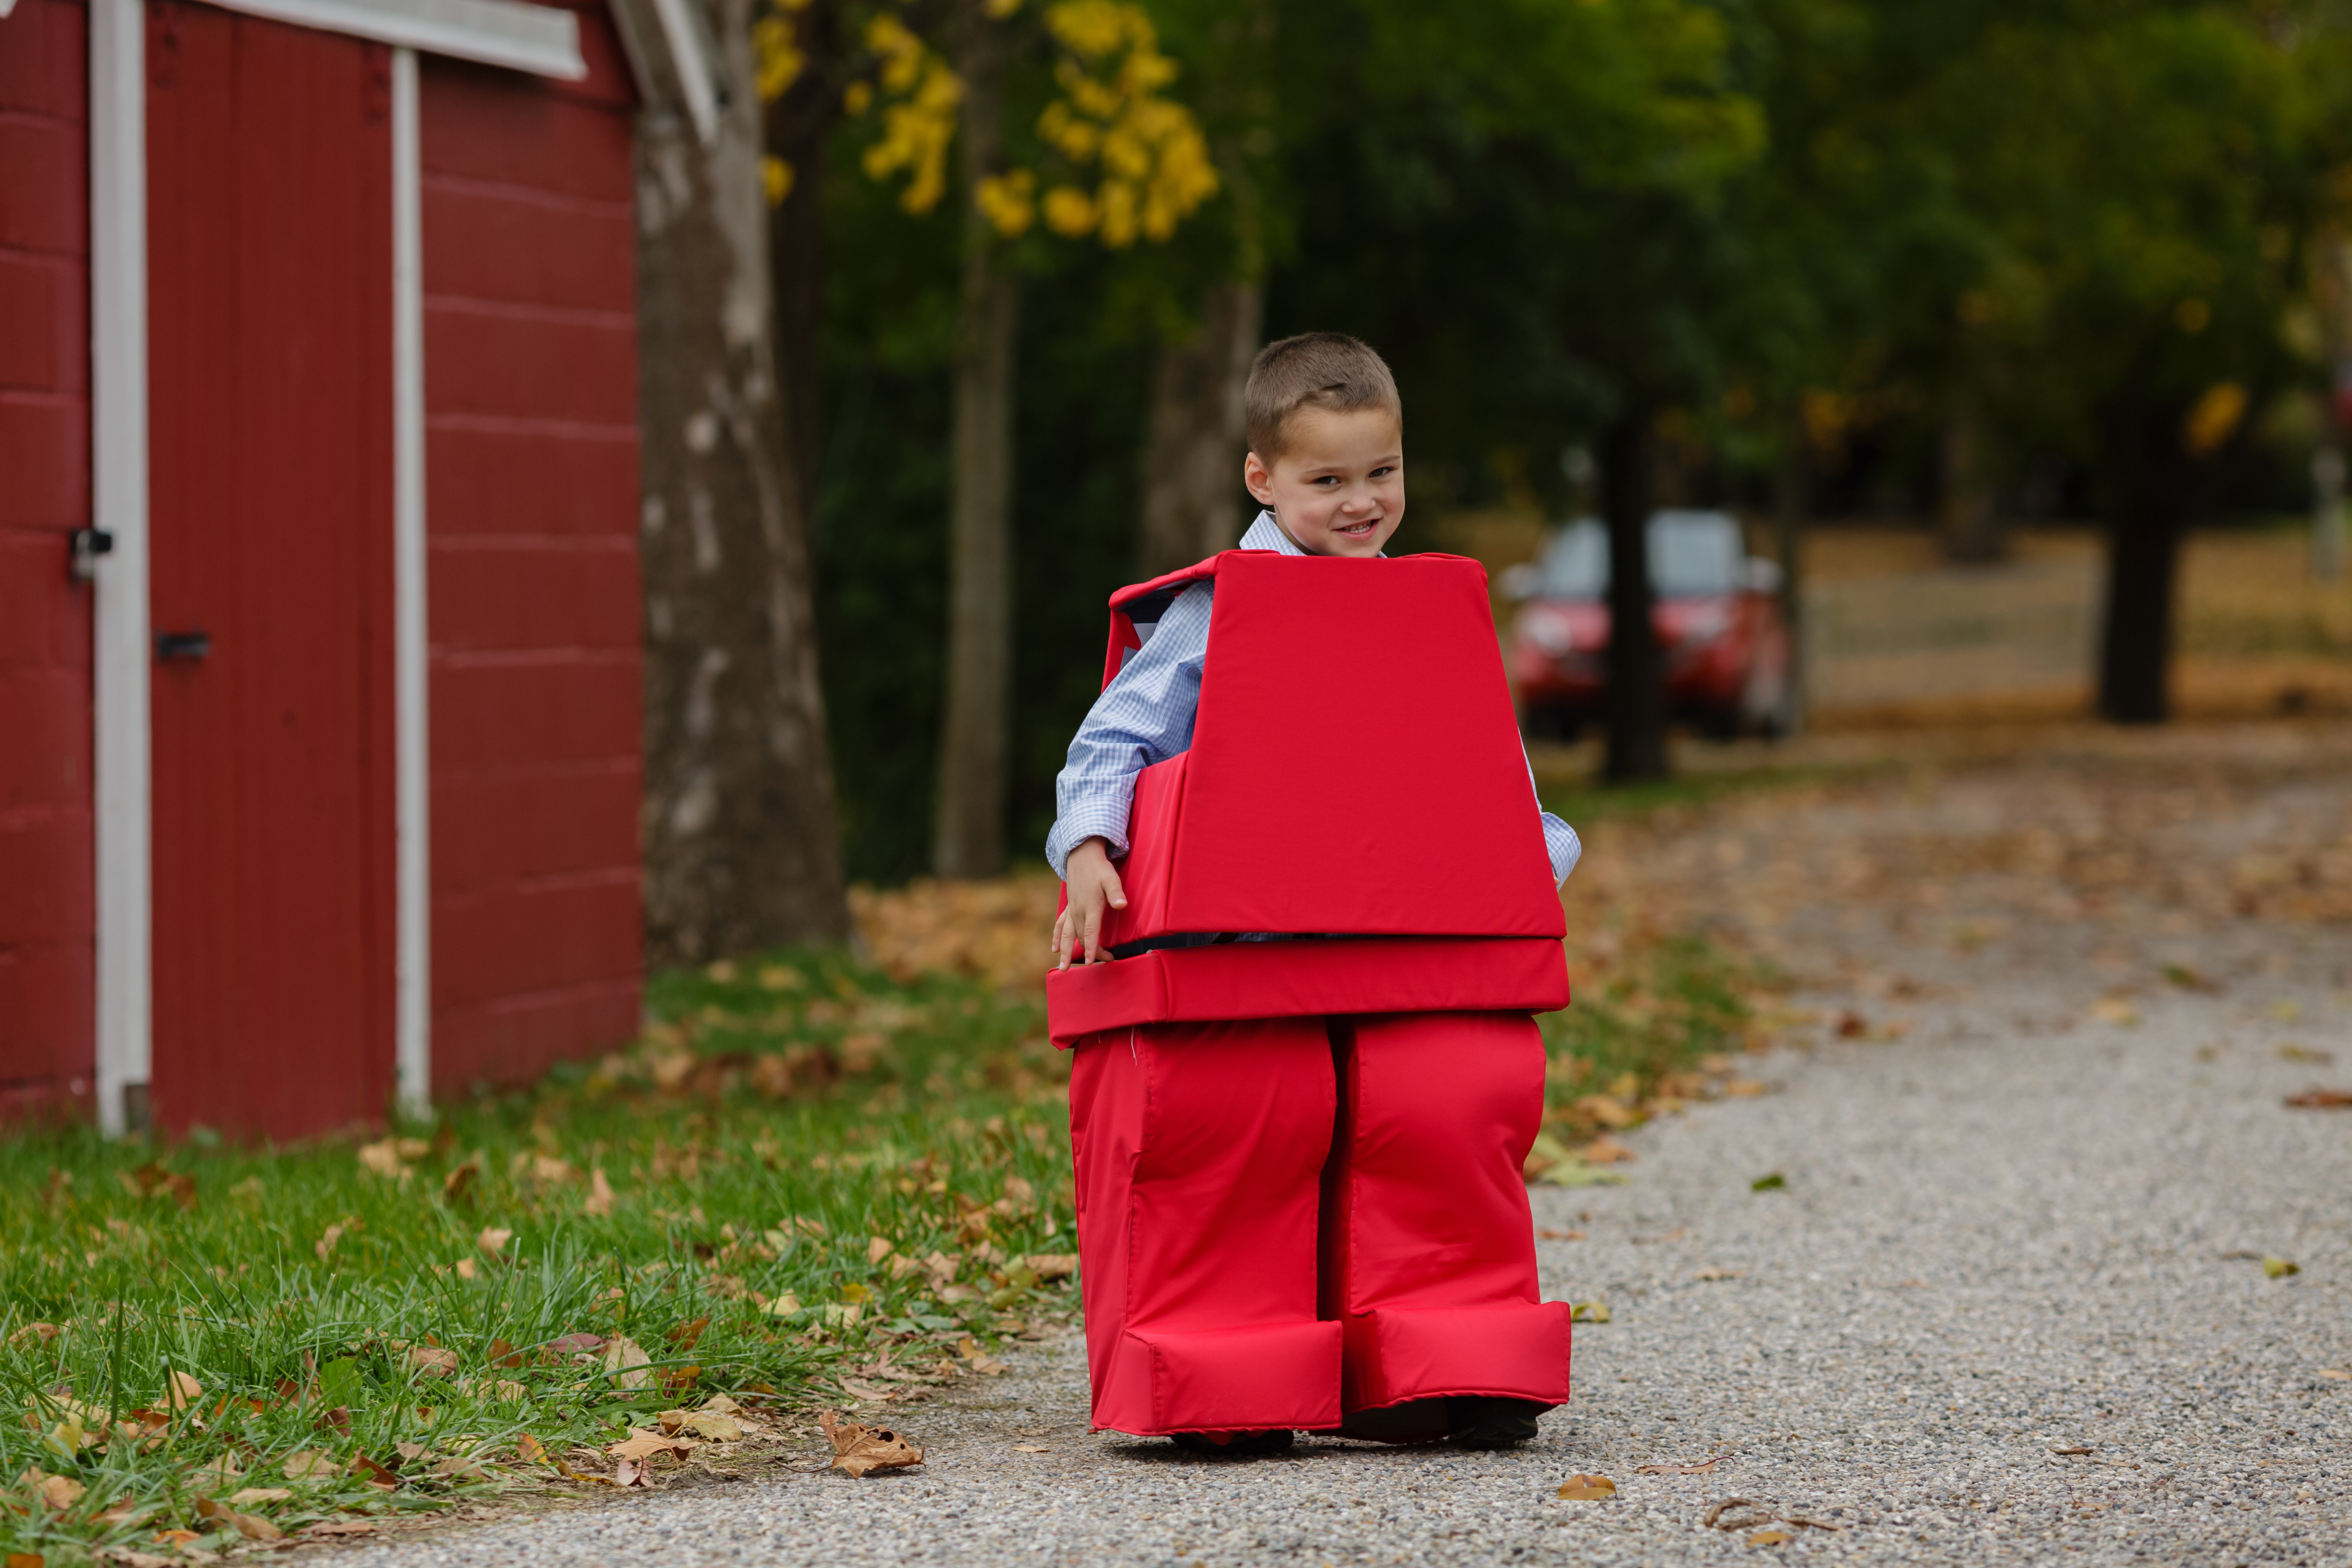
I started with the pants, since they were the hardest part. I googled how people make them, and generally they cut foam to the dimensions they need and sew it together (with the “right sides” facing out), and then paint it the color they want. I wanted the costume bottom/top/head to have a consistent feel, so I made the legs out of foam, and then covered them with fabric. At the top of the legs, I cut out a rectangular-shaped piece of corrugated plastic and hung the legs from them, then hung the base on old suspenders.

Lego minifig pants. Foam-covered fabric hangs from a corrugated plastic square, which is attached to suspenders.
For the body tops, Doug cut corrugated plastic out to the right dimensions and duct taped it together, and I covered that with fabric too. Having all the dimensions online made this surprisingly simple!
Lego minifig top cut from corrugated plastic, duct-taped together, and covered with fabric.
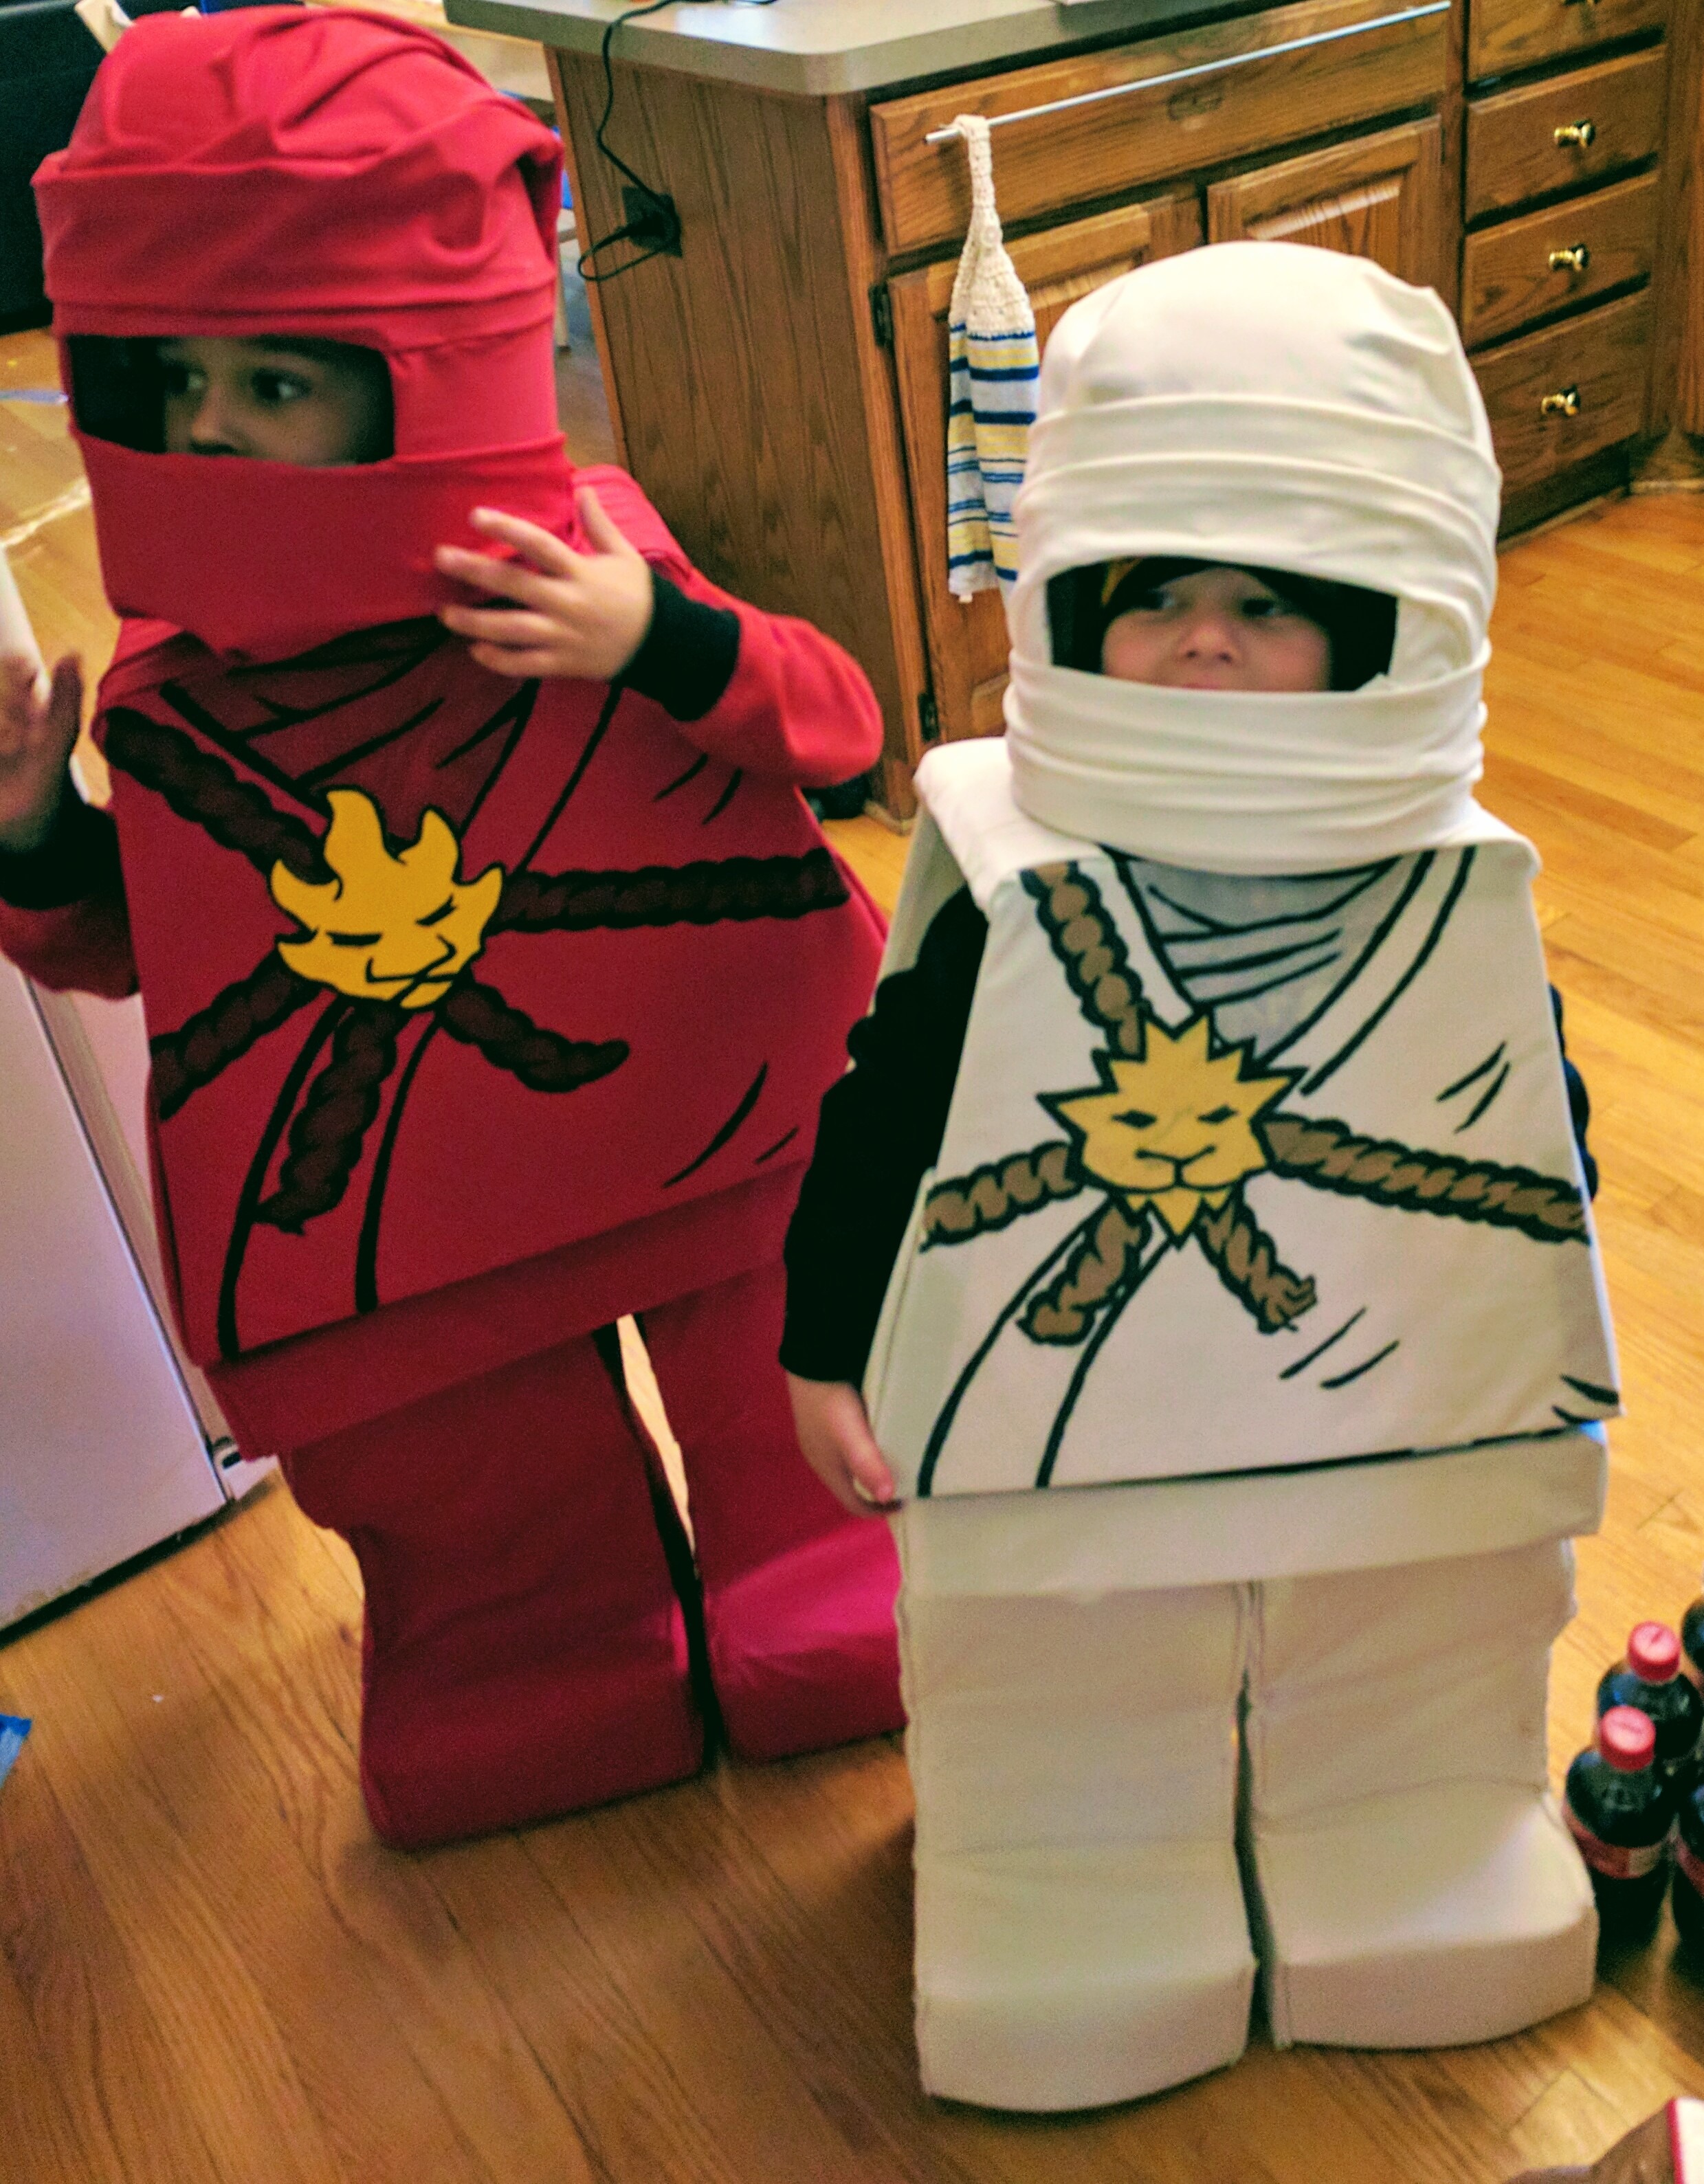
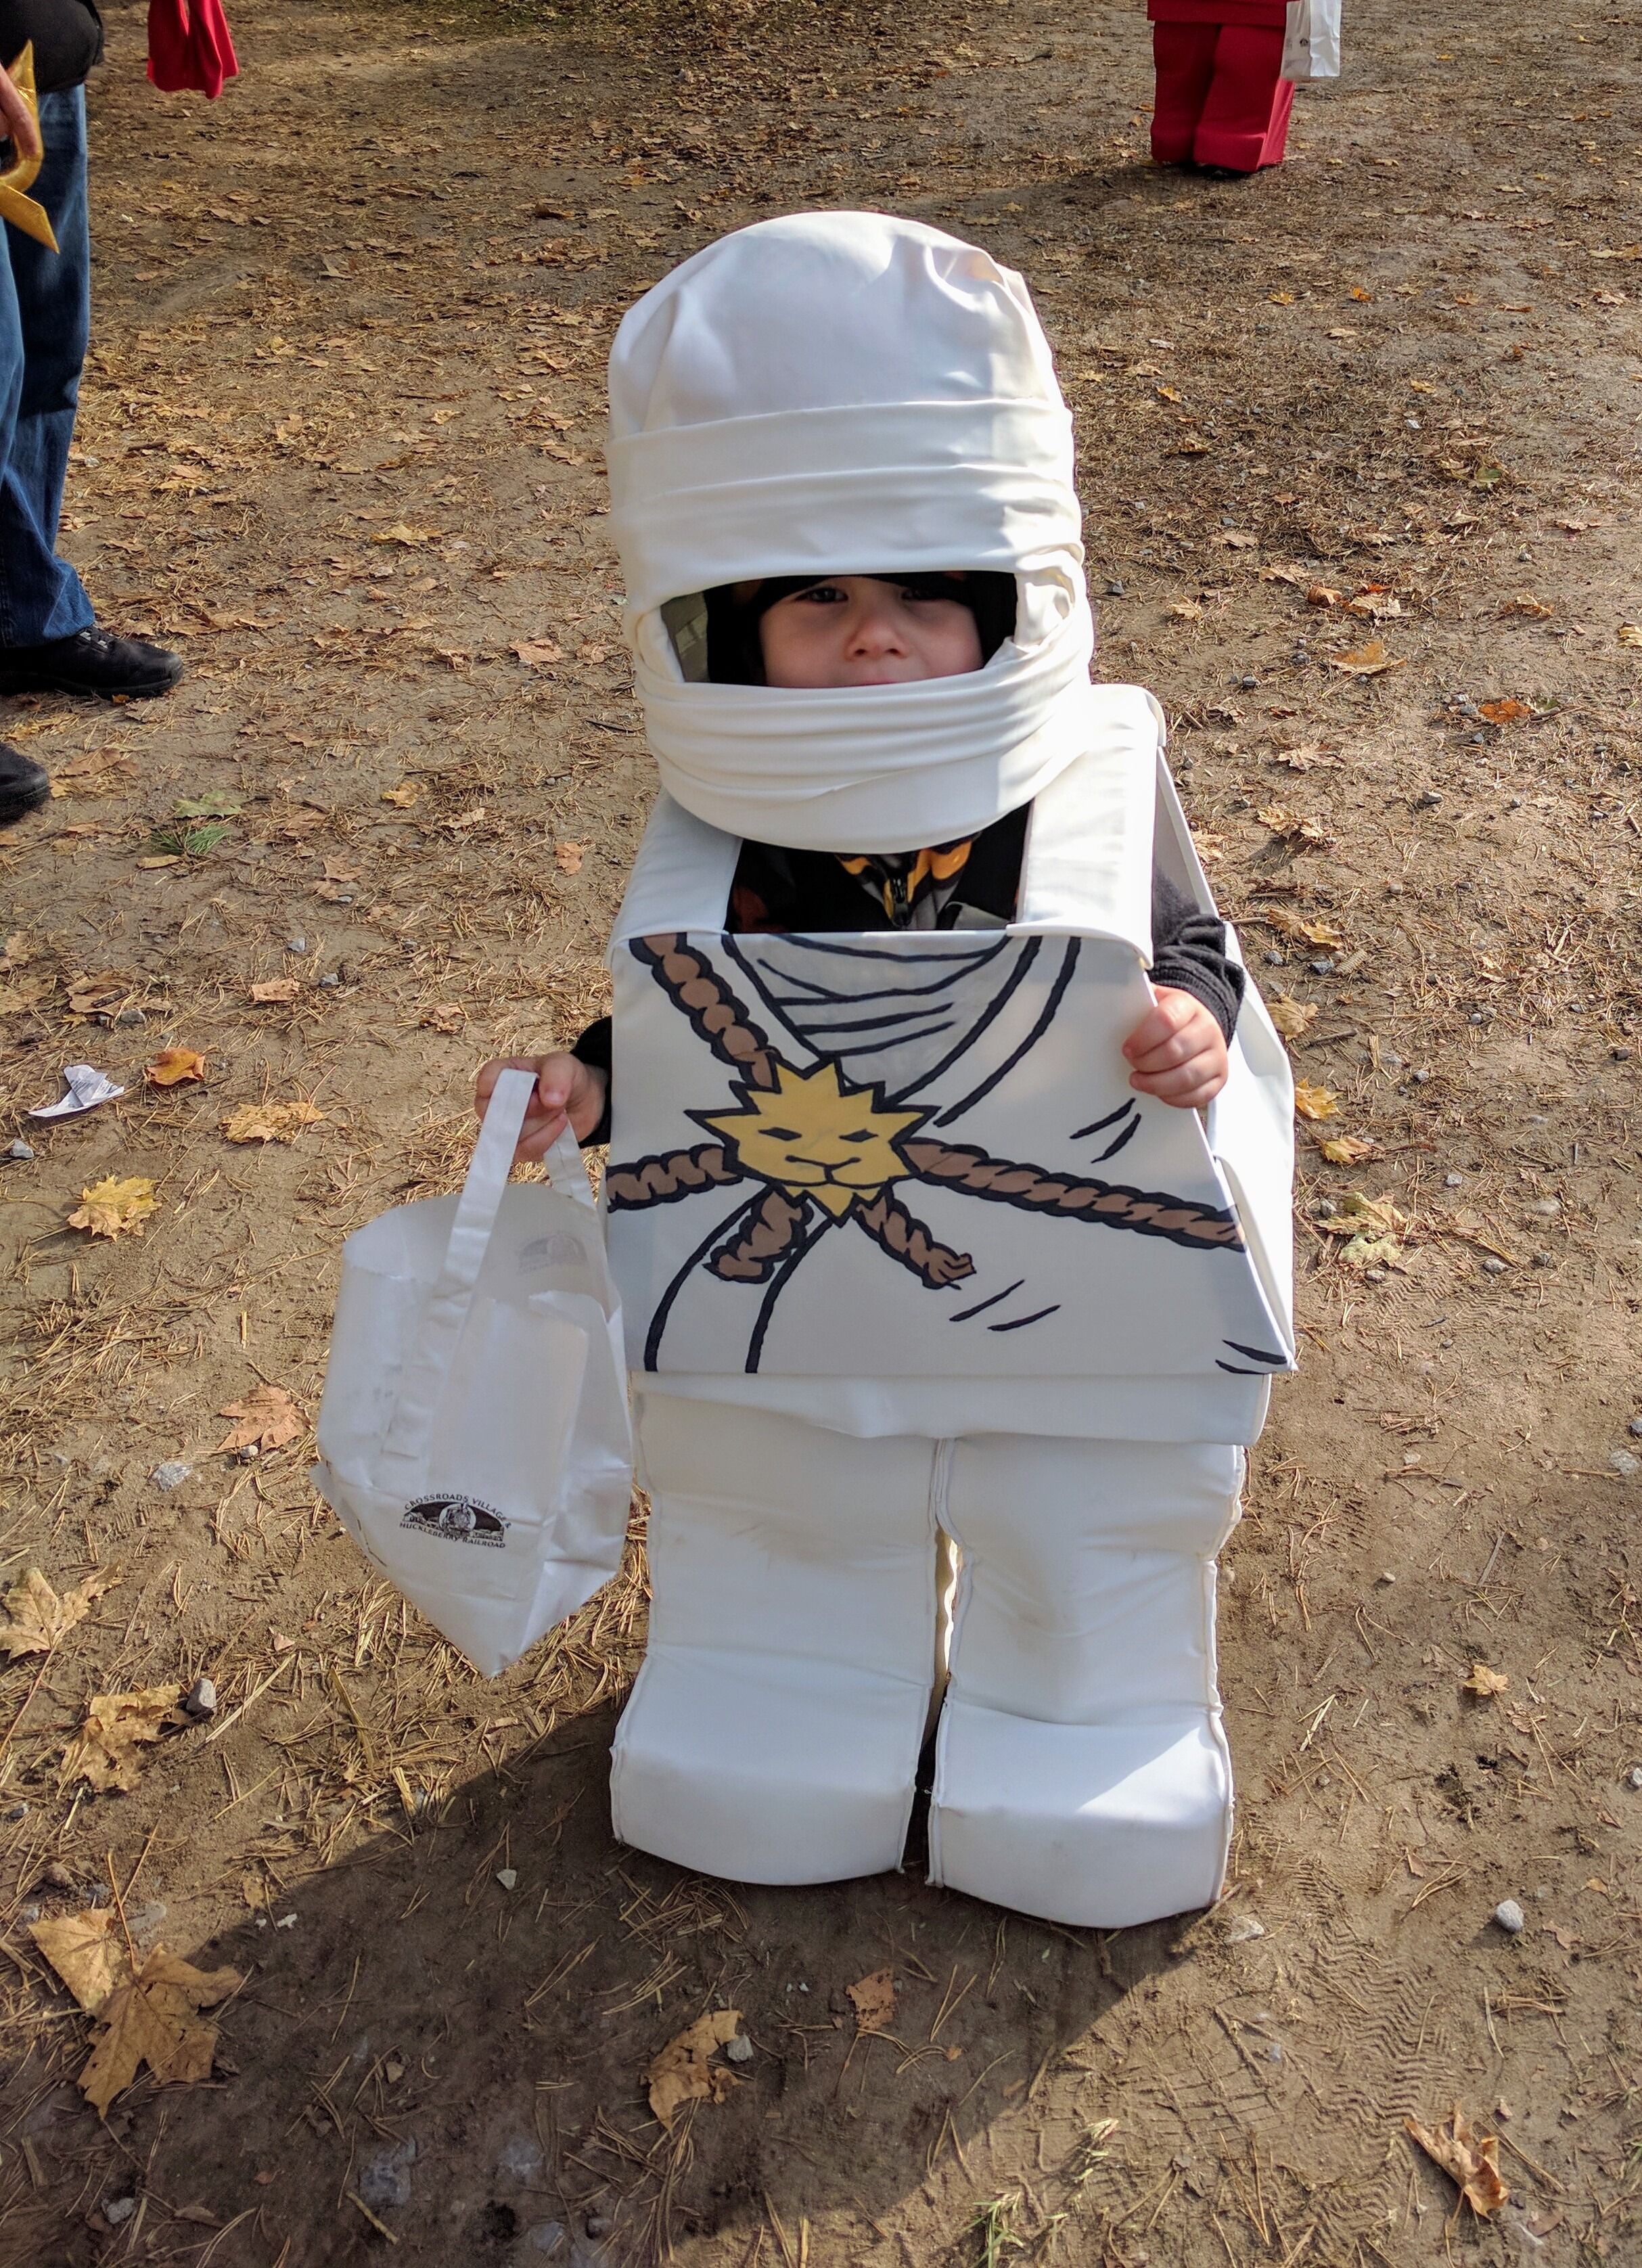
For the fronts of the costumes, I did Google image searches for each character, printed out pictures of the lego minifig front, and traced them onto the fabric with marker (I cut out some yellow paper, drew on it, and glued it on for Kai’s star).
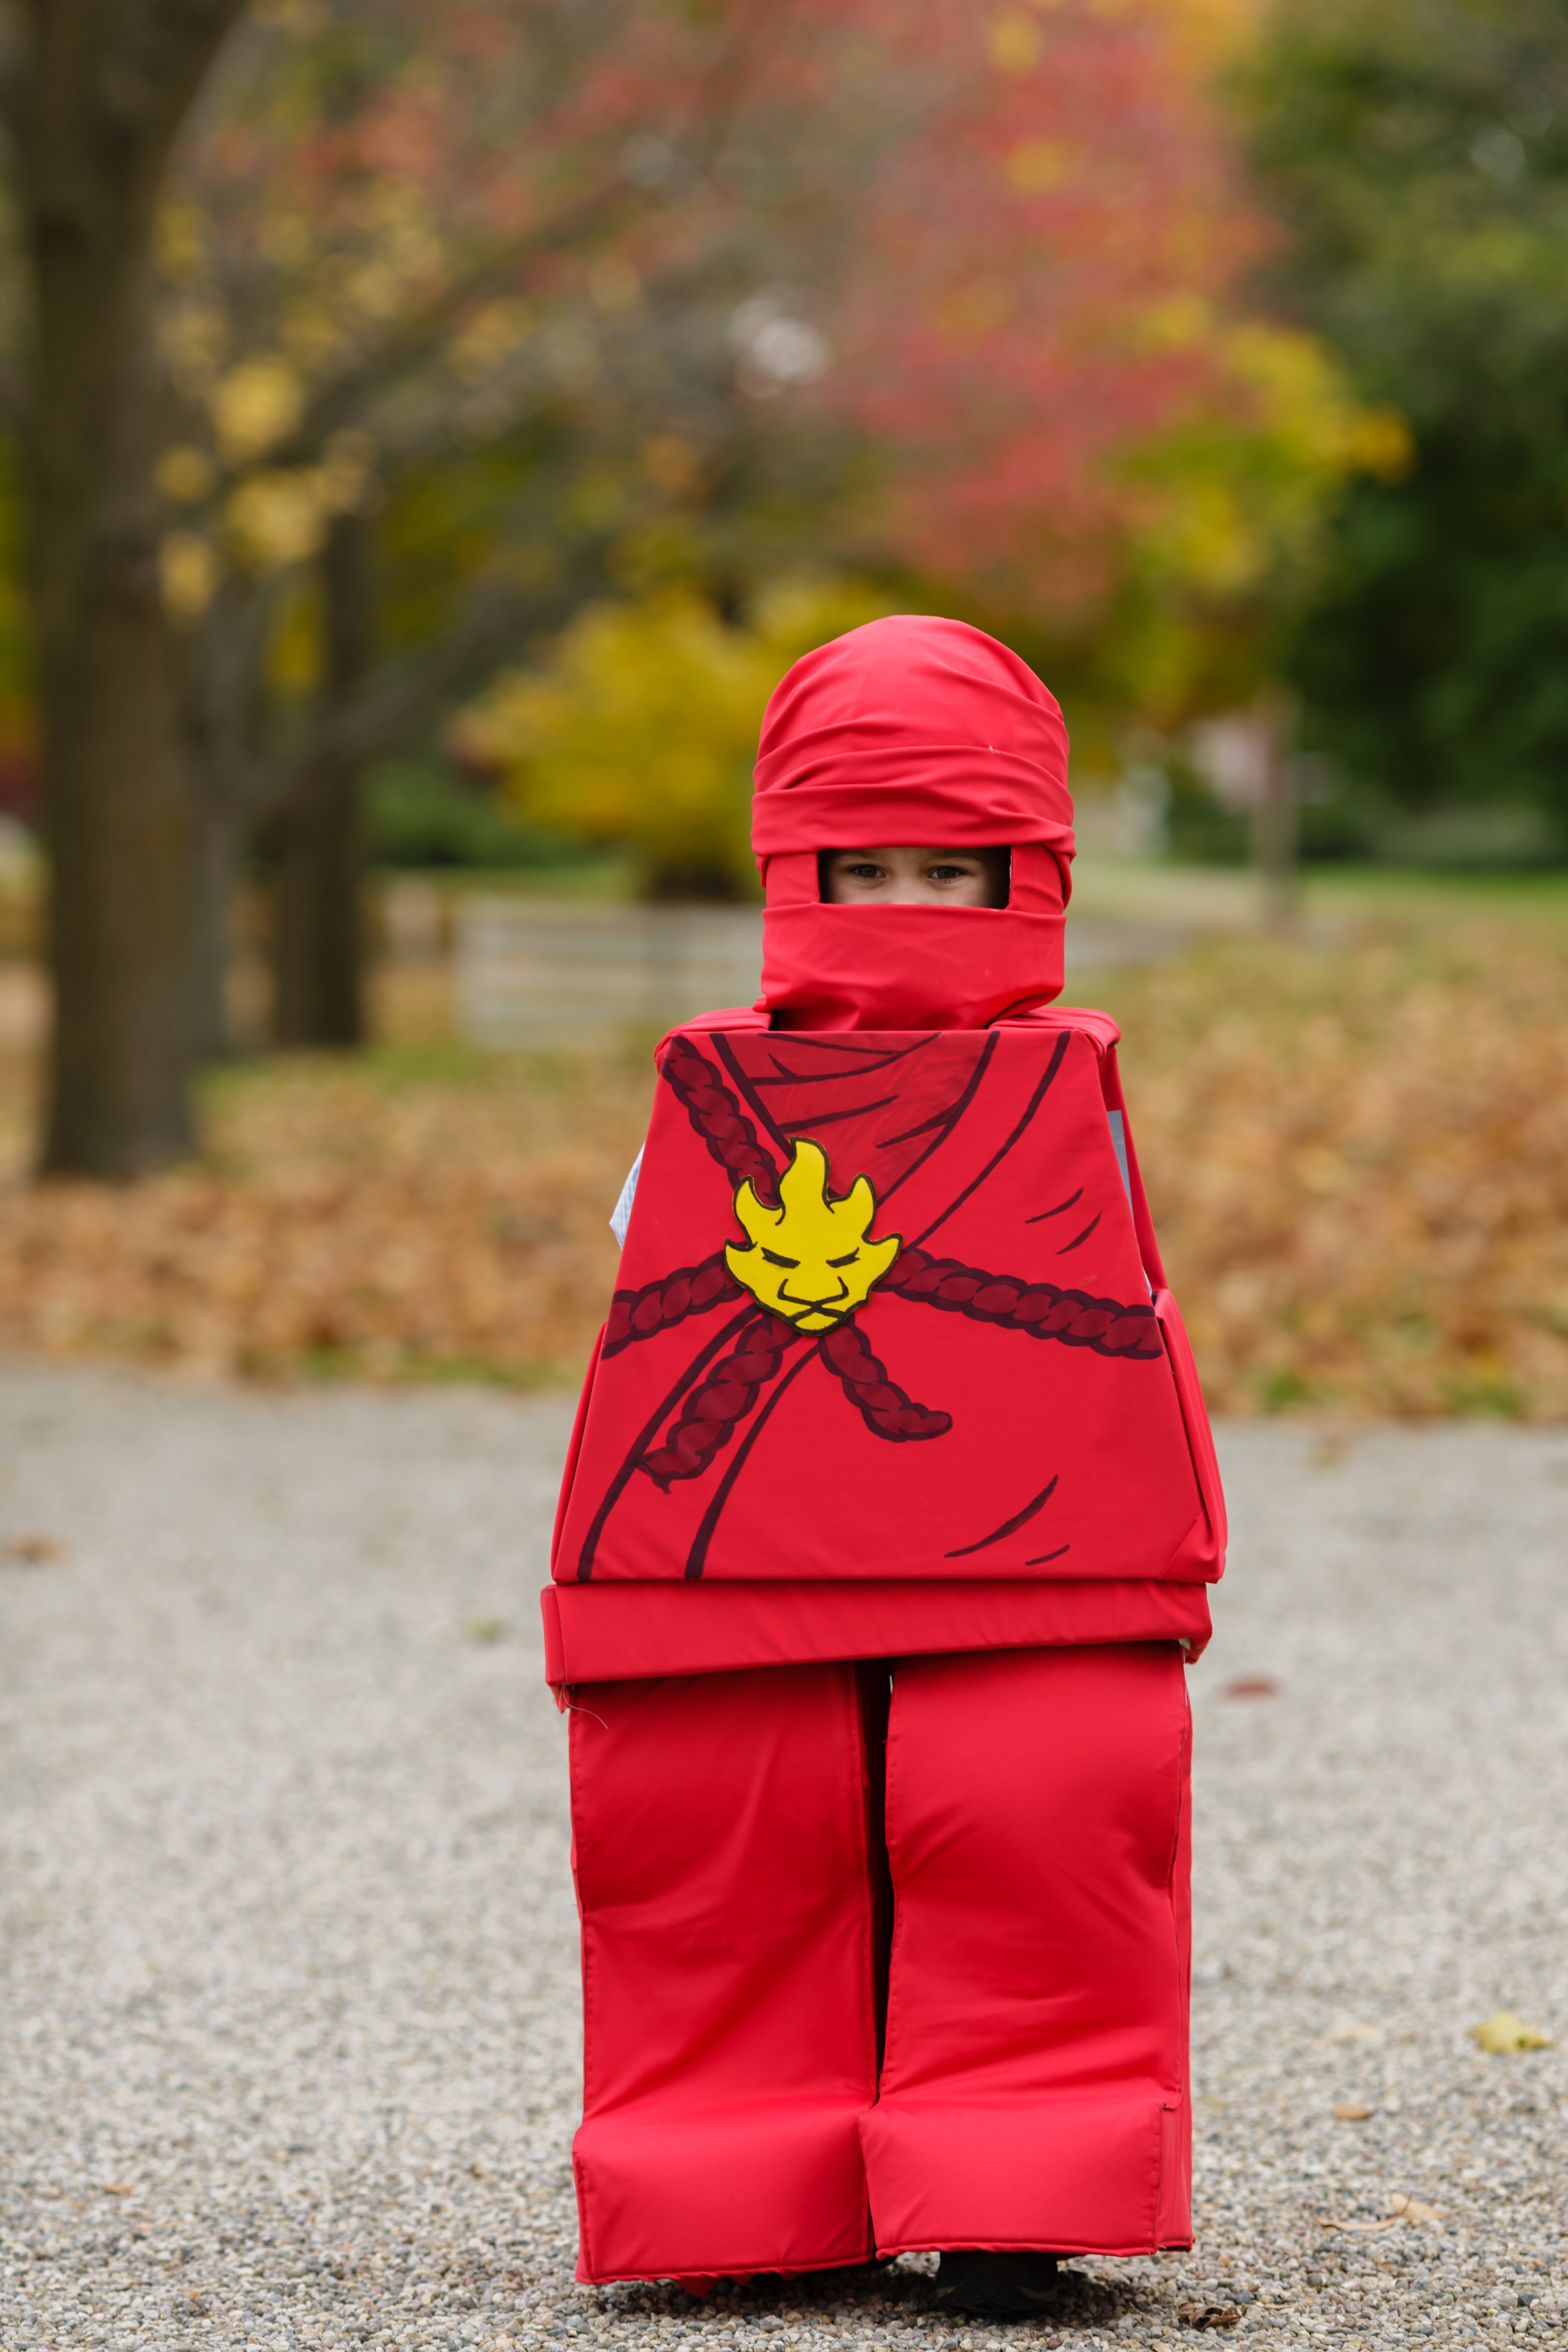
Costume front traced with marker and decorated with paper.
The helmets were the hardest part. We had a lot of false starts trying to get the base right. I was really hoping we could just 3D scan the actual minifig helmets and 3D print them. But we couldn’t find a 3D scanner that had high enough resolution. We finally got a cheap rubber ball at Five Below, cut it in half, and heavily duct-taped poster board around the bottom edge. This still ended up being too heavy for the kids to wear for a long time, so they did a lot of trick-or-treating with the masks off. I wrapped the fabric around the ball/posterboard and glued it down with a lot of fabric glue, and it made a cool ninja style mask.